

|
| Tips, Techniques, and Questions -- Technical questions or tips |

2010-04-08, 7:43am
|
 |
Senior Member
|
|
Join Date: Oct 02, 2007
Location: Toronto
Posts: 441
|
|
 murrini question
I have made murrini so I know the basics but I'm curious to know how the murrini are made which look like a dot(s) with thin radiating lines. Like the spokes of a wheel. Is an optic mold used or is the hot glass rolled across the slices of color? It's caused an itch I can't scratch! Please someone hand me a backscratcher!
Laurie
http://www.designerbeads.com
|
2010-04-08, 7:57am
|
 |
Senior Member
|
|
Join Date: Jan 14, 2007
Location: Fullerton, CA
Posts: 4,834
|
|
Maybe they use clear on the outside? If I'm understanding your question correctly. Sometimes it just naturally radiates. Like when you make a twisty out of EDP and intense black. The black spreads, it's SO cool!

It's not murrini, but it shows how the black radiates. The yellow is not part of the twisty!
__________________
Patti T.
Fullerton, CA
To view links or images in signatures your post count must be 5 or greater. You currently have 0 posts.
|
2010-04-08, 9:51am
|
 |
Senior Member
|
|
Join Date: Aug 01, 2005
Posts: 2,159
|
|
It's a multi-stage process. Simplified: You have to make the radiating line pieces by pulling flat cane and cutting it to short lengths. You then attach the flat cane pieces perpendicular to the core piece all the way around to make the 'spokes', fill in between with your contrasting color or transparent then pull out the final murrini. It sounds a whole lot easier than it actually is in practice.
Robert
__________________
Robert Simmons
(Former) Director for Bead Donations
Beads of Courage, Inc.
|
2010-04-08, 9:59am
|
|
Senior Member
|
|
Join Date: Oct 02, 2007
Location: Toronto
Posts: 441
|
|
gosh, it sounds pretty complicated...Thanks for the explanation...and there I was hoping for a simple magic solution. Maybe cut some sheet glass into spokes, hmmmm....
|
2010-04-08, 10:18am
|
 |
Ass-kicking Cephalopod
|
|
Join Date: Jun 19, 2006
Location: Duh, Squidville
Posts: 9,523
|
|
If you're talking about what I think you're talking about, it is stripes on the outside of the murrini. When you apply it, you heat the top and the top closes up a little bit - poke the middle with a tool and when you heat it again, the stripes come together in the center with just a small dot in the middle.
__________________
To view links or images in signatures your post count must be 5 or greater. You currently have 0 posts.
DOG is my co-pilot
Cricket w/two 5 lpm oxycons - and sometimes a Minor.
|
2010-04-08, 10:21am
|
 |
Goddess
|
|
Join Date: Jul 12, 2005
Location: Germany
Posts: 3,033
|
|
Can you post a picture? That always helps to clarify exactly what you mean. If I understand you correctly then what you are describing can be made with an optic mold...assuming I am understanding you correctly.
__________________
Teresa To view links or images in signatures your post count must be 5 or greater. You currently have 0 posts.
To view links or images in signatures your post count must be 5 or greater. You currently have 0 posts.
To view links or images in signatures your post count must be 5 or greater. You currently have 0 posts.
**
To view links or images in signatures your post count must be 5 or greater. You currently have 0 posts.
**
To view links or images in signatures your post count must be 5 or greater. You currently have 0 posts.
**
To view links or images in signatures your post count must be 5 or greater. You currently have 0 posts.
**
To view links or images in signatures your post count must be 5 or greater. You currently have 0 posts.
|
2010-04-08, 10:24am
|
 |
I speak Murrini!
|
|
Join Date: Oct 12, 2006
Location: In a Glass House, CA
Posts: 9,170
|
|
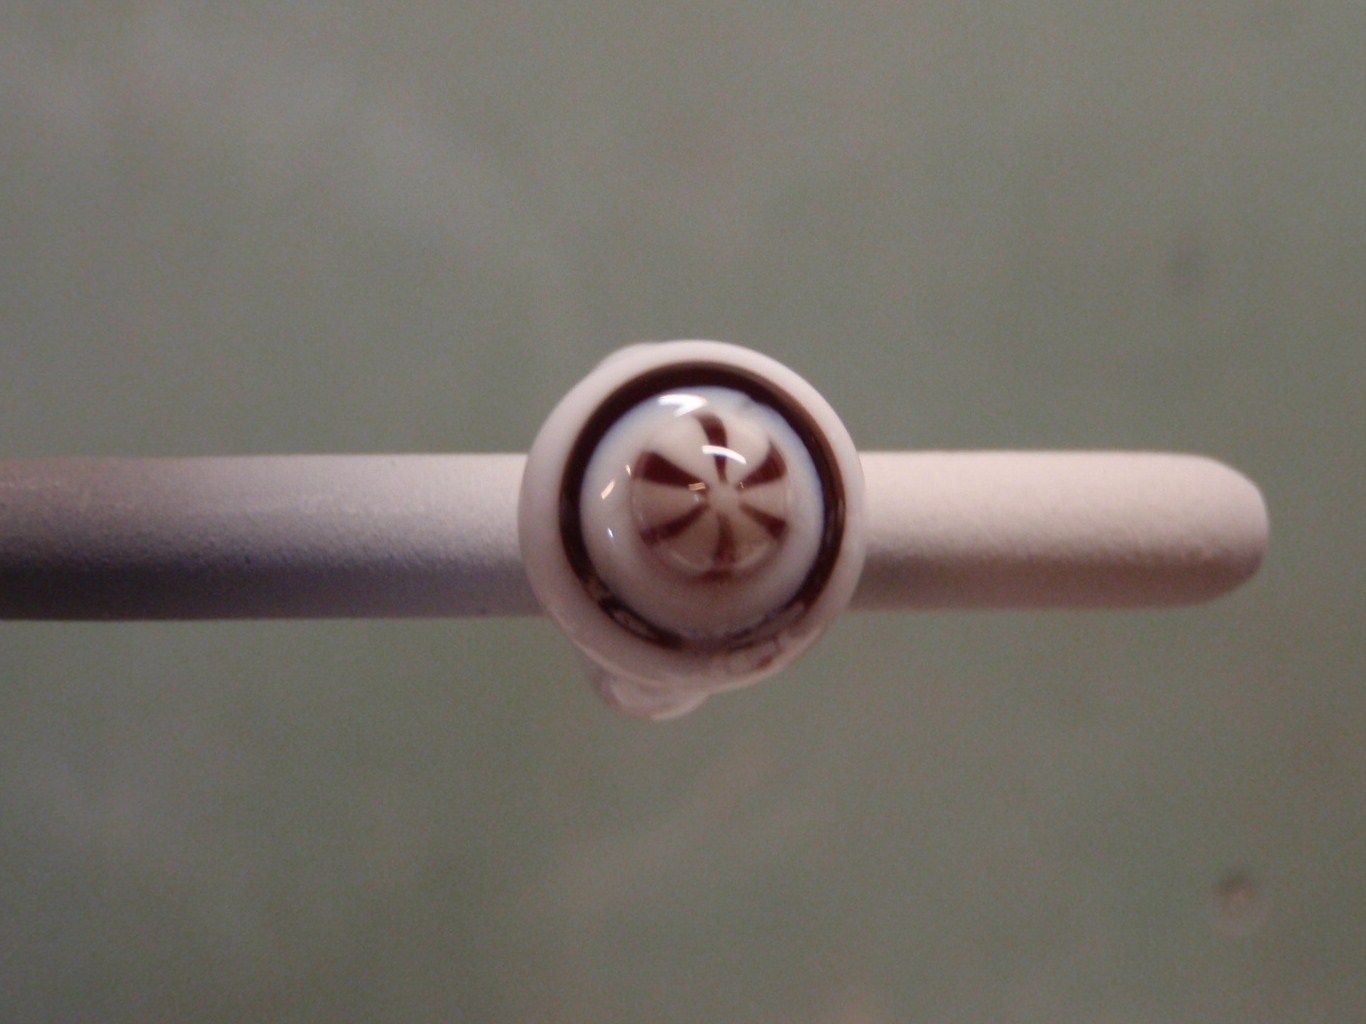
I'm wondering if you're referring to some of the "starburst" type of murrini you see that have a "core" color, and general "base" color and then lines radiating from near the center core to the outter-most edges of the murrini?
If so, give this a try:
1. Wind a small gather of "core" color to start; work into round. Don't make this too large in diameter.
2. Wind a second color - this will be basically your "base" color - all the way around your "core" color. marver this down to the core color; sometimes two layers of this "base" color gives it a nice concentration.
3. Using stringer, add stripes all the way around the "base". I use a top/bottom method - in other words, I start at 12 o'clock, move to 6 o'clock, then 10 o'clock, then 4 o'clock.
4. Going back around the gather, add stringer stripes in between the four you've just laid down, being careful to keep them evenly spaced from one another. Stripes at the 2 o'clock and 8 o'clock give you six fairly evenly spaced stripes. Also, if you'd like, add a stripe of the "base" color in between each of these stringer stripes. Sometimes, I add a second layer of the stringer color right on top of the first; variations are fun to experiment with and yield interesting results.
5. Carefully melt in all the stringer stripes, trying not to let them spread and touch one another. Kinda like this:

When you heat the gather and pull, you'll end up with a striped cane:
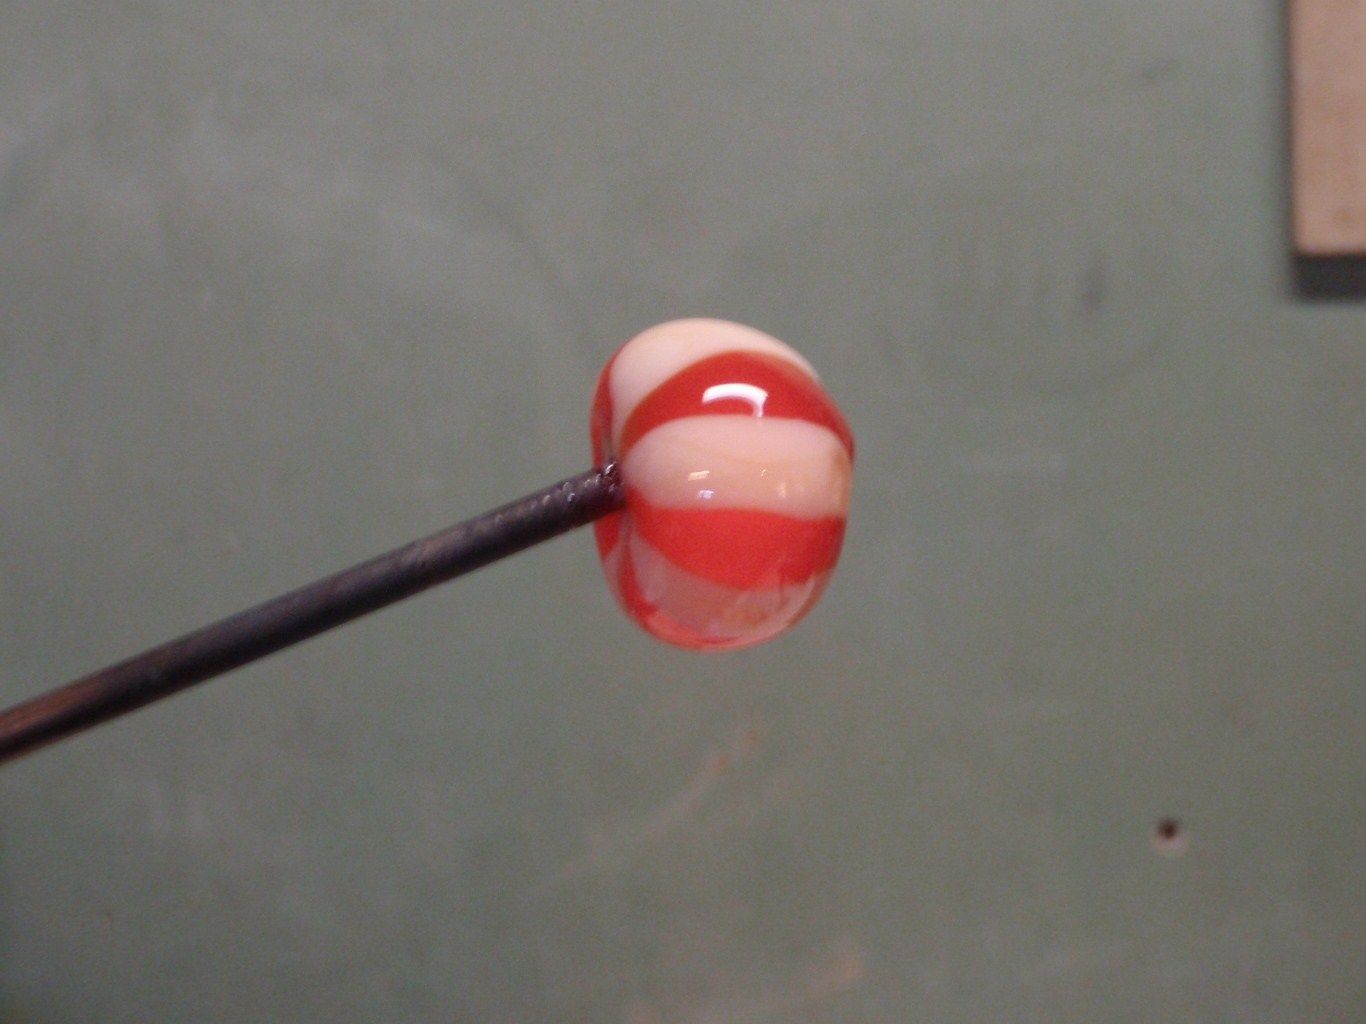
When the striped cane is nipped into slices, applied and heat is given, the stripes pull to the center:
Is this what you mean?
__________________
~DeAnne~
I've got a murrini for that,'ya know!
To view links or images in signatures your post count must be 5 or greater. You currently have 0 posts.
"Only a fool rushes to his own demise..." ~Zorro
|
2010-04-08, 10:41am
|
|
Goddess
|
|
Join Date: Jul 12, 2005
Location: Germany
Posts: 3,033
|
|
Doh, nevermind 
__________________
Teresa To view links or images in signatures your post count must be 5 or greater. You currently have 0 posts.
To view links or images in signatures your post count must be 5 or greater. You currently have 0 posts.
To view links or images in signatures your post count must be 5 or greater. You currently have 0 posts.
**
To view links or images in signatures your post count must be 5 or greater. You currently have 0 posts.
**
To view links or images in signatures your post count must be 5 or greater. You currently have 0 posts.
**
To view links or images in signatures your post count must be 5 or greater. You currently have 0 posts.
**
To view links or images in signatures your post count must be 5 or greater. You currently have 0 posts.
|
2010-04-08, 11:16am
|
|
Senior Member
|
|
Join Date: Oct 02, 2007
Location: Toronto
Posts: 441
|
|
Yes! That's a great tutorial!
thank-you, thank-you
Laurie
http://www.designerbeads.com
|
2010-04-08, 2:08pm
|
 |
Queen Bee
|
|
Join Date: Oct 26, 2008
Location: Ellington, CT
Posts: 1,253
|
|
Awesome explanation and pics, De!
__________________
To view links or images in signatures your post count must be 5 or greater. You currently have 0 posts.
Donna
To view links or images in signatures your post count must be 5 or greater. You currently have 0 posts.
Vintage & Contemporary Beads, Findings, Chains, Trinity Brass, Vintaj, Bead Tubing, Bobbins
To view links or images in signatures your post count must be 5 or greater. You currently have 0 posts.
Handmade Artist Lampwork Jewelry
|
2010-04-08, 3:49pm
|
|
Senior Member
|
|
Join Date: Aug 01, 2005
Posts: 2,159
|
|
Quote:
Originally Posted by designerbeads

gosh, it sounds pretty complicated...Thanks for the explanation...and there I was hoping for a simple magic solution. Maybe cut some sheet glass into spokes, hmmmm....
|
You can do it this way too, just be sure that you've properly pre-heated the strips. It's not easy, but doable.
Robert
__________________
Robert Simmons
(Former) Director for Bead Donations
Beads of Courage, Inc.
|
|
Currently Active Users Viewing This Thread: 1 (0 members and 1 guests)
|
|
|
 Posting Rules
|
You may not post new threads
You may not post replies
You may not post attachments
You may not edit your posts
HTML code is Off
|
|
|
All times are GMT -7. The time now is 9:31pm.
|


